
Blogs, Bevel Gear
Spiral Bevel Gear Pair Inspection Before Final Assembly
Nov
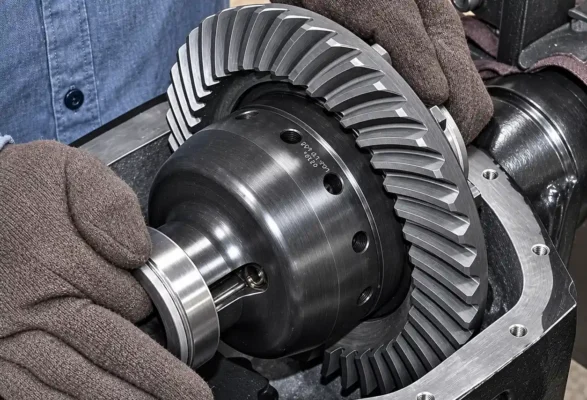
Before final assembly, inspect a spiral bevel gear pair together. Check that the pinion and gear match, and confirm their mounting position, backlash and tooth contact. Checking each gear on its own is not enough because the two gears must work correctly together.
At Wenlio, we make custom gears for OEM transmissions and industrial equipment. Checking the gear pair before assembly can help find fitting or meshing problems early.
This guide explains the main checks engineers should make before a spiral bevel gear pair is approved for final assembly.
Common Problems Caused by Incorrect Spiral Bevel Gear Assembly
Spiral bevel gears transfer power between shafts that meet at an angle. Their curved teeth must fit together correctly. This depends on the tooth shape and the position of both gears.
Even if each gear passes its own inspection, problems may still occur if the parts are mixed or fitted in the wrong position:
- Too much or too little backlash.
- Uneven tooth contact.
- The gears catch or bind as they turn.
- Faster tooth wear.
- Problems during final assembly.
Before assembly, check that the pinion and gear belong together and are set in the correct positions.

Check That the Pinion and Gear Match
Before checking sizes, make sure the pinion and gear are the correct pair.
Some spiral bevel gears are made, tested or lapped as matched pairs. Do not mix gears from different sets unless their fit has been checked. Mixing them can change how the teeth touch.
Check the following information:
| Inspection Item | What to Check |
| Part number | Correct pinion and gear |
| Set number | Matching serial or batch number |
| Tooth count | Correct gear ratio |
| Spiral hand | Left-hand or right-hand |
| Rotation direction | Required input and output direction |
| Matching marks | Pair marks, if provided |
| Drawing revision | Latest approved drawing |
Keep each matched pair together during inspection, storage and assembly. Read more about matched bevel gear pairs.
Check Dimensions, Tooth Surfaces and Material
After checking the pair identification, inspect each gear for size and visible damage.
Size checks
Check the key sizes shown on the drawing, including:
- Bore diameter and fit on the shaft.
- Keyway or spline size, if used.
- Outside diameter and face width.
- Mounting face and seating surface sizes.
- Bearing seat diameter, if required.
- Radial and axial runout.
- Tooth thickness and other required gear sizes.
Use the approved drawing and inspection plan for these checks.
Tooth surface check
Look for dents, burrs, scratches, rust and other damage on the working tooth surfaces. Check the tooth edges carefully, as damage in these areas can affect how the gears touch.
Material and heat treatment check
If required, check the material certificate and heat treatment records. Also check surface hardness, core hardness and case depth.
These checks help confirm that the gears meet the agreed requirements before assembly.
Check Mounting Distance and Assembly Positions
Mounting distance sets the position of a bevel gear in the housing. If it is wrong, the backlash and tooth contact can change.
Before fitting the gears, check:
- Pinion mounting distance.
- Gear mounting distance.
- Reference faces and measurement points.
- Required shaft angle and alignment.
- Offset for hypoid gears, if used.
- Bearing and housing positions.
Check mounting distance against the gear drawing and the bearing and housing layout.
If shims are needed, choose them according to the drawing and assembly instructions. Do not use shims to hide a shaft angle or alignment problem.
For more details, read our guide to bevel gear mounting distance.
Measure Backlash
Backlash is the small gap between the teeth of two gears when they are fitted together.
Too much or too little backlash can affect how the gears run.
| Backlash | Possible Effects |
| Too much | Can cause knocking when the load changes and reduce positioning accuracy |
| Too little | Can make the gears run too tightly, increase friction or cause binding |
| Uneven | May point to a mounting, runout or tooth shape problem |
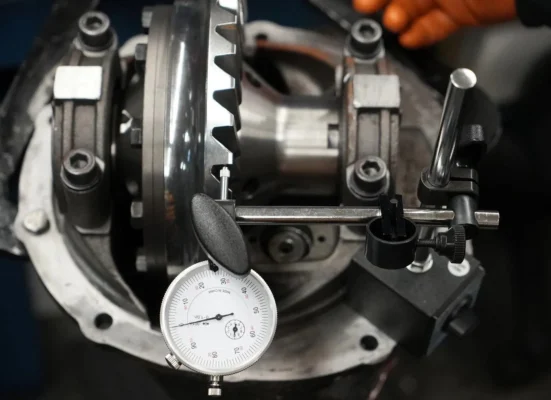
How to measure backlash:
- Fit the gear pair in the specified fixture or housing.
- Set both gears in the positions shown on the drawing.
- Hold the pinion still.
- Place a dial indicator against the specified point on the mating gear.
- Turn the gear gently in both directions while keeping the pinion still.
- Record the indicator reading. Repeat at the required points.
Use the measurement position and method given in the inspection instructions.
There is no single backlash value for every spiral bevel gear pair. Use the value shown on the drawing or agreed with the customer. It depends on the gear design and how the gears are fitted.
Check the Tooth Contact Pattern
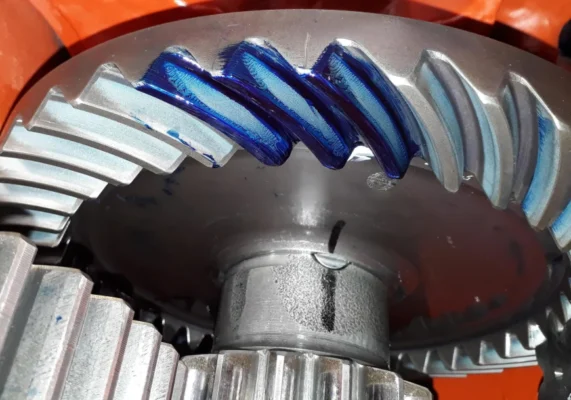
A tooth contact pattern shows where the two gears touch. It helps check whether the contact is in the right area.A common method is to apply marking compound to the specified tooth surfaces.
How to check the contact pattern:
- Clean the gear tooth surfaces.
- Apply a thin, even layer of marking compound.
- Fit the gear pair in the specified position.
- Turn the gears under the required test conditions.
- Look at the marks left on the teeth.
- Compare the marks with the approved design or inspection requirements.
If required, check both the drive side and coast side of the teeth.
- Where the marks sit along the tooth face.
- How the marks spread across the tooth height.
- Whether the marks reach or bunch up at an edge.
- Any difference between the drive side and coast side.
The contact mark does not always need to be in the exact center. The right position depends on the gear design and how the gears will be used.
If the contact marks are not right, check the mounting distance, shaft alignment, bearings and tooth shape before making changes.
Final Rotation Check Before Assembly
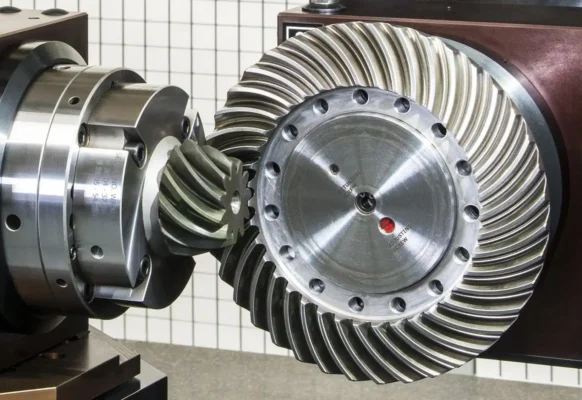
After checking the sizes and the gear pair, turn the gears under the specified assembly conditions.
Check that:
- The gears turn smoothly.
- There is no catching or binding.
- Backlash is within the required range.
- The contact pattern meets the agreed requirements.
- Bearings and mounting parts are in the correct positions.
- The correct matched pair is being installed.
Record the results before approving the gear pair for final assembly.
Depending on the order, records may include size checks, gear measurement results, backlash readings, contact pattern photos, material certificates and heat treatment records.
Spiral Bevel Gear Pre-Assembly Checklist
Use this checklist as a quick reference for quality teams, assembly staff and OEM buyers.
| Inspection Step | What to Check | Check Against |
| Identification | Part number, set number, pair marks | Approved drawings and records |
| Visual inspection | Tooth damage, burrs, rust | Agreed visual requirements |
| Size inspection | Bore, mounting surfaces, runout | Engineering drawings |
| Tooth details | Tooth profile, pitch, tooth thickness | Required gear accuracy |
| Material and heat treatment | Material, hardness, case depth | Purchase requirements |
| Mounting positions | Mounting distance, shaft angle, offset | Assembly drawings |
| Backlash | Gap between mating teeth | Approved backlash range |
| Contact pattern | Where and how the teeth touch | Design requirements |
| Final rotation | Smooth movement, no binding | Assembly instructions |
| Records | Inspection reports and traceability | Quality agreement |
The checks needed will depend on the gear design, application and customer requirements.
For checks before shipment, see our bevel gear inspection checklist.
FAQ
Q1: Can individually checked spiral bevel gears still have assembly problems?
Yes. Checking each gear alone does not show whether the pair has the correct mounting position, backlash or tooth contact.
Q2: Should spiral bevel gears always be supplied as matched pairs?
No. But if gears are made or tested as a matched pair, keep them together unless the manufacturer has confirmed that they can be swapped.
Q3: What affects spiral bevel gear backlash?
Backlash can change with tooth thickness, mounting distance, shaft alignment, bearing conditions and assembly tolerances.
Q4: Is backlash inspection enough to check gear meshing?
No. Check both backlash and tooth contact pattern to see how the gears fit together.
Q5: What information is needed for a custom spiral bevel gear order?
Send the gear drawings, tooth counts, gear ratio, shaft angle, spiral direction, mounting distance, material, heat treatment and inspection requirements. If drawings are not available, samples and assembly details can help.
Conclusion
A good spiral bevel gear assembly starts with the correct gear pair and the right checks. Before installation, confirm the gear sizes, mounting distance, backlash and tooth contact.
For OEM transmissions and replacement parts, agreeing on these checks early helps both sides understand what needs to be made and how the finished gear pair will be checked. The checks should match the gear design and its working conditions.
If you are planning a new gear set or looking for replacement gears, send us your drawings, sample details or application information through Contact Us, and we can review your requirements and discuss the next steps.
